How to Start a Blog
** This post contains affiliate links! This means if you click on a link in this post, I may receive a small commission. I only promote products, brands, and companies I love! Thank you for supporting Living the Gray Life **
Blogging has truly changed my life, and it’s become my entire life. I have no idea where I’d be without this here blog. I’ve “met” so many amazing people through blogging, I’m able to look back and watch myself develop into the person I am today, and the blogging community is probably the most supportive and encouraging group of people on the Internet.
For me, blogging encapsulates everything I love to do – web design, web development, graphic design, writing, networking, photography, etc. I love to share my story and hopefully inspire other bloggers, college students, and young women to go out and achieve everything they want to do.
If you’re looking to start a blog, yay for you! You’re about to embark on a journey that quite possibly could change your life.
I have an entire Beginner Blogger series to help people just like you achieve all of your blogging goals! If you have any questions about anything, feel free to reach out in the comments or shoot me an email at hello@livingthegraylife.com. I love helping beginner bloggers get their start!
Alright so here’s some Q&A’s I usually get that I’m addressing right now:
Who do you use to host your website?
I chose to go with HostGator because it was the most conveniently priced option at the time. There are a ton of other hosting companies like BlueHost, GoDaddy, and so many more.
What do you use to run your site?
This here blog is run on WordPress. It’s a great, free tool that hundreds of thousands of companies and bloggers use for their sites. It’s easy to use, and you can honestly get as technical as you want with it.
How do you find themes?
WordPress has a ton of free theme options, and if you want to know where I got my theme, I actually made it myself! I don’t recommend you coding a theme yourself unless you’re pretty experienced with HTML/CSS and kinda know how PHP works. There are sites like Pipdig that I know a ton of bloggers use.
If you have any particular questions about what I did to create this here blog, head over to my Blog FAQ page where I answer everything from editing software to fonts and colors!
Let’s get you blogging!
Step 1: Start with Self-Hosted
Starting out as self-hosted will save you SO much time and energy down the line. I honestly wish I began as a self-hosted blog instead of starting with WordPress.com and later switching to self-hosted.
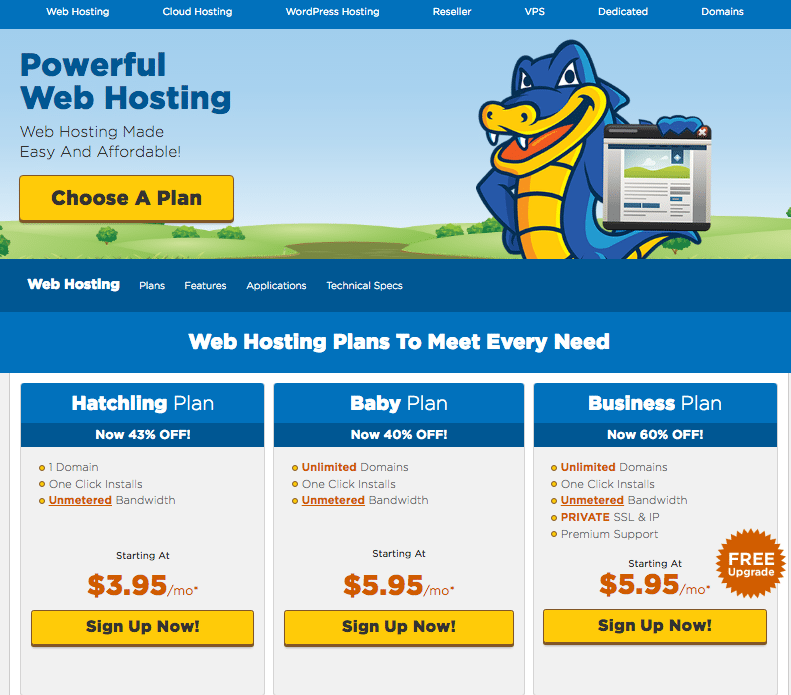
Head over hostgator.com to get started!
You’re going to want to choose the plan that works best for you. The Hatchling Plan is usually the cheapest option and the best for intro bloggers. I, however, went with the Baby Plan because I have abigailthomas.com that I also needed a host for. The Baby Plan killed two birds with one stone.
Step 2: Choose a Domain
Ahhh! Besides designing your site, this is probably the most stressful, fun, and important part of your blog.
Take some time when deciding on your site name. It took me over a week to settle on one specific name.

Here are some pieces of advice when it comes to choosing your domain name:
- Don’t include specific words like “college,” “food,” “fitness,” etc. This will limit you to that specific topic, and if there’s one thing to know when it comes to creating a blog, your focus will shift over time.
- Names are a great choice! So abigailthomas.com is a great example.
- Keep it short and sweet.
- Don’t include numbers at the end just because the domain you want is taken.
Step 3: Confirm Your Hosting Plan
Once you’ve decided on your domain name, and it’s not taken, all you have to do is fill out the rest of the hosting plan info!
For me, I went with the 3 Year plan because I know I’m going to blogging for a good long while.
Step 4: Install WordPress
One thing I love about HostGator is their simple WordPress installation! Even if you have no idea what you’re doing when it comes to the technical side of things (although I really suggest you get comfy with HTML and CSS), their one-click install is almost fool-proof.
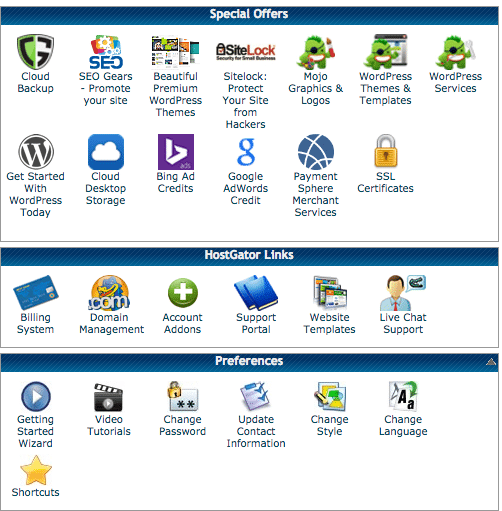
Under “Special Offers”, click “Get Started with WordPress Today.” This is a super simple WordPress install that will walk you through exactly what you need to do to get your brand new domain set up with WordPress!

Once you install WordPress, it will take a little while for your site to actually appear. I would give it 2-3 hours, but once your site is up and ready, it’s time for all the fun stuff, and you’re one step closer to starting to document your fitness journey!
Step 5: Begin Blogging!
Alright, alright it’s not that simple. But, now that you’ve done all the technical work, it’s time for the fun part: designing, writing, and editing!
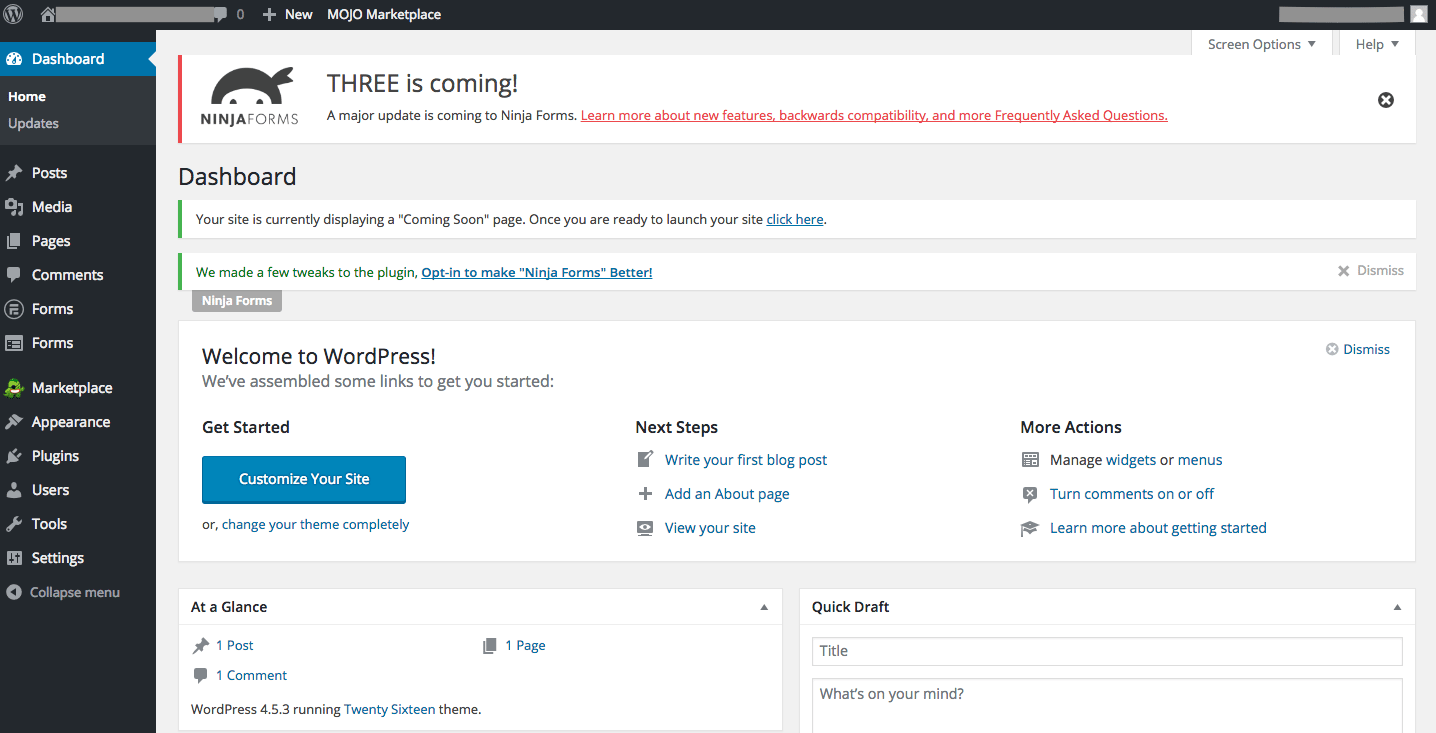
Once you log in to WordPress, this is your WordPress dashboard. You can customize basically everything in regards to your site from this dashboard. Think of it as your friend, become accustomed to it, and learn to love it. My best advice for understanding the WordPress dashboard is to just play around. Click on the tabs in the left-hand menu, see where everything is, and if you’re confused about what something does, Google it.
Seriously, when it comes to any kind of tech problem, the first thing any IT person will most likely ask is “Did you Google it?” It’s what I do, it’s what all my friends do, and it’s what the professional world does as well.
Themes:
This is the most exciting part! Like I said earlier in the post, WordPress has a ton of free themes available, and most likely they’ll fit what you need when you first start out blogging.
If you’re looking for something more serious, check out:
1. PipDig
2. Creative Market
If you like the theme on this blog, send me an email at hello@livingthegraylife.com or leave a comment below, and I’d be glad to customize a theme just for you! Not only is it a free theme for you, but it will help me build my web development portfolio as well!
Plug-ins:
Plug-ins are super helpful tools that will transform the way you blog. Think I’m kidding? I’m not. They’re basically super easy ways for you to customize your blog’s without you having to do all of the messy, backend development work.
Here are the ones I swear by:
I’m big on security and not being hacked, and duo authentication is one of the best ways to do this. With Clef, you log in to WordPress on your computer using an app on your phone. That’s really not the best description, but I’d install it if I were you.
Have you seen all of those pretty comment sections at the bottom of almost every blog? Well that’s typically created with Disqus. I SWEAR by Disqus because it not only looks great, but it’s super easy to use even if you don’t have a Disqus account. Ease-of-use is key if you want people to comment on your stuff, and Disqus does that.
Do you see that lovely Instagram feed at the bottom of my blog? I used Instagram Feed to create that. It’s a bare-bones plug-in which means you need to do a little finessing with the CSS to get it to look the way you want. With that being said, when you do figure it out, it’s SO worth it!
This gives you all of the amazing features of a WordPress.com blog on your very own self-hosted blog!
jQuery Pin It Button for Images
If you hover over a majority of my images in my posts, you see a beautiful “Pin It” square appear, and that is created with this lovely plug-in! You have the ability to fully customize the image that appears when you hover over an image allowing you to really make it fit the theme of your blog.
Jessica Slaughter introduced me to this little gem. I use it whenever I am disclosing that a post includes sponsored content or affiliate links (just like this post!). You can see it in action right below the first photo in this post! If you want to know how to make it work, check out Jessica’s amazing tutorial.
I saved the best for last. As a blogger, you’re going to learn the importance of SEO if you want people to find your content through search engines like Google and Bing. I’m definitely not an expert on it, but Morgan from Mostly Morgan does a brilliant job of explaining everything you ever need to know about SEO.
Additional Software:
Let’s be honest here: YOU DO NOT NEED FANCY SOFTWARE OR EQUIPMENT TO BE A SUCCESSFUL BLOGGER. All you need is a camera (the one on your phone works great), some editing software (there are tons of amazing freebies out there), and a creative mind.
Evernote – FREE
Every blogger has a different way of doing things with their post creation process, so feel free to develop your own! I love Evernote because I can easily edit things offline, and it’s just a great organizational tool for me when it comes to writing posts. It’s simplistic, organized, and easy to use. That’s all I need.
Affinity Photo & Affinity Designer – $50 each
If you’re considering buying a subscription for Adobe Photoshop or Adobe Illustrator, stop right now. If you’re not a professional photo editor or designer, these two pieces of software do the job just fine for way less money and once you buy them, they’re yours. There’s no annoying monthly subscription. It’s one and done. And y’all, they’re only $50 each!
I invested in both back in January, and let me just say it’s the best investment I’ve ever made. Editing photos is a breeze and designing logos and stuff for the blog is even easier. I cannot recommend these enough.
VSCO Cam – FREE
Honestly, what blogger doesn’t use VSCO Cam. It’s a highly popular app, and there’s a reason for that! All of my Instagram photos are edited in VSCO Cam. It’s a great way to create a cohesive look between all of your photos, and you can easily adjust so many properties. My favorite filter is HB2, just saying.
Get to Creating!
Now it’s your time to shine! Blogging is an amazing way for you to share your story and personality with the world. Write posts because YOU want to write them, create content because it’s something YOU want to do, and don’t let blogging become something you do for other people.
You never know who is reading, and you never know whose life you may change with your story.
Have fun!
~abigail gray

